Vegetables
Garlic Care in Winter NZ: Feed, Mulch & Maximise Your Crop
4 August 2026 · 8 min read
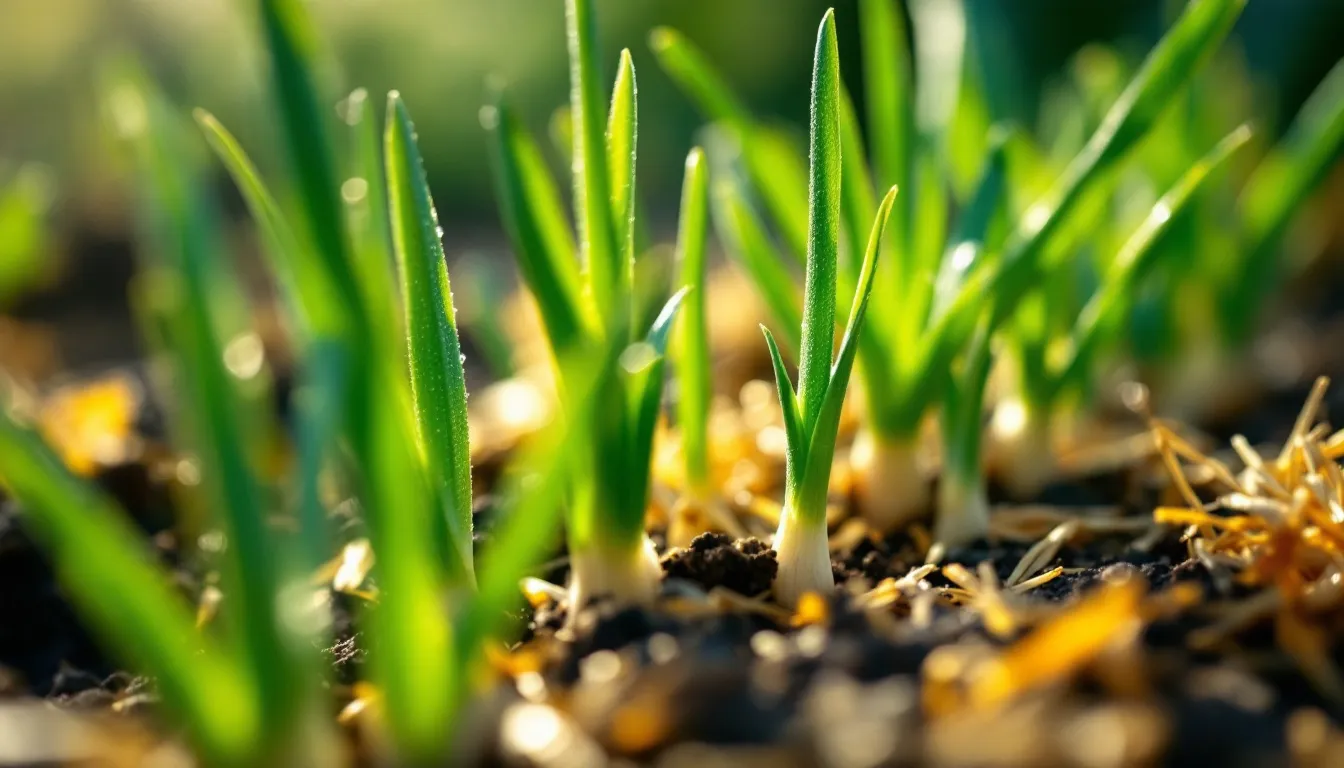
🧄 Why Winter Garlic Care Makes or Breaks Your Harvest
Garlic care in winter NZ is one of those gardening tasks that quietly determines everything. You've done the satisfying work of planting your cloves in autumn (ideally late April through June), and now the cold months stretch ahead. It can be tempting to leave your garlic bed alone and wait for spring — but the decisions you make between June and August will directly shape the size, flavour, and storability of your bulbs come December. A little attention now pays off in spades (pun intended) at harvest time.
Garlic is a wonderfully hardy crop, well-suited to New Zealand's cool winters from Northland right down to Southland. However, "hardy" doesn't mean "neglect-proof." Across our diverse climate zones — from the wet winters of the West Coast to the crisp frosts of Central Otago and the mild, damp winters of Auckland — garlic has slightly different needs. This guide walks you through everything: feeding schedules, mulching technique, watering, pest watch, and how to read your plants so you can step in at exactly the right moment.
🌱 Understanding Garlic's Winter Growth Cycle in NZ
After planting, garlic enters a slow but purposeful phase. The clove sends down roots before it pushes up a shoot, and this root establishment is critical. Throughout winter, the plant builds a strong underground foundation. Visible top growth may be modest — a few firm green spears — but below the surface, the plant is busy.
By late winter (August), you should see noticeably stronger leaf growth as the days lengthen. Each leaf that forms above ground corresponds to a wrapper layer around the eventual bulb — more healthy leaves generally means a better-wrapped, longer-storing bulb. This is why keeping the plant healthy and stress-free all winter is so worthwhile.
What "Healthy" Looks Like in Mid-Winter
Upright, firm green spears — not floppy or yellowing
Steady (slow) growth week on week
Soil that is moist but never waterlogged
No signs of mould, rot, or heavy pest damage at the base
🌿 Feeding Your Garlic Through Winter
Garlic is a moderate-to-heavy feeder, and getting the fertiliser timing right is one of the most impactful things you can do during winter. The goal in these cold months is to support leaf and root growth — not to force rapid, lush top growth that can become frost-tender.
What Nutrients Does Garlic Need in Winter?
Nitrogen (N): Encourages healthy green leaf development. Apply in modest amounts — too much in deep winter can push soft growth susceptible to frost.
Phosphorus (P): Vital for strong root development, especially in the early weeks after planting.
Sulphur (S): Often overlooked, but sulphur is closely linked to garlic's flavour intensity and bulb formation. Many NZ soils, particularly in high-rainfall areas, can be sulphur-deficient.
Potassium (K): Supports overall plant resilience and disease resistance through the cold months.
A Simple Winter Feeding Schedule
Shortly after shoots emerge (May–June): Apply a balanced organic fertiliser or a light top-dress of well-composted manure around (not on) the shoots. This gives roots the phosphorus boost they need early on.
Mid-winter (July): Apply a gentle nitrogen feed — a liquid seaweed or fish fertiliser works beautifully here and won't overwhelm the plant. Dilute to the recommended rate and water in well.
Late winter (August): As growth picks up, you can give a slightly stronger feed. A granular fertiliser with added sulphur is ideal at this stage to set up bulb development for spring.
Avoid over-fertilising with high-nitrogen feeds in the coldest weeks (June–July in most regions). In areas like Canterbury and Otago where hard frosts are common, lush soft growth is far more vulnerable to frost damage.
🌾 Mulching: Your Garlic's Best Friend in Winter
Mulching a garlic bed in winter serves several vital functions at once — it's one of the highest-return tasks you can do for almost no cost.
Benefits of Mulching Garlic in Winter
Insulates roots from hard frosts, particularly important in inland South Island regions
Retains soil moisture evenly, reducing the feast-or-famine watering cycle that can stress bulbs
Suppresses winter weeds that compete for nutrients
Improves soil structure as organic mulches break down slowly over winter
Moderates soil temperature fluctuations between cold nights and warmer winter days
Best Mulch Materials for Garlic in NZ
Pea straw: A classic choice — lightweight, breaks down well, and widely available at garden centres across NZ. Apply 5–8 cm deep.
Barley or oat straw: Similar to pea straw; excellent insulation without becoming too dense.
Untreated grass clippings (dried): A free option if you have them. Apply thinly and allow to dry first to avoid matting and rot.
Sugarcane mulch: Available in many NZ garden shops; breaks down relatively quickly and adds organic matter.
Shredded autumn leaves: Great if you have them on hand — run a mower over them first to prevent matting.
How to Apply Mulch Without Smothering Your Garlic
Pull the mulch back slightly from the base of each shoot — you want a small clear space of 2–3 cm around the stem so air can circulate and moisture doesn't sit right against the plant. Spread the mulch 5–8 cm deep across the rest of the bed. If you're in a particularly frosty region (think Maniototo, Mackenzie Basin, or high-altitude parts of Hawke's Bay), you can go up to 10 cm deep.
💧 Watering Garlic in a NZ Winter
One of the most common mistakes NZ gardeners make with winter garlic is either ignoring watering entirely or, conversely, watering too much on top of already-wet winter soil. The key word is drainage.
Garlic absolutely hates sitting in waterlogged soil — this is the fastest route to basal rot and fungal issues.
In regions with high winter rainfall (Westland, Northland, parts of Wellington), focus on drainage rather than irrigation. Raised beds or mounded rows make a huge difference here.
In drier winter regions (Canterbury Plains, Otago, Hawke's Bay), you may need to water every 10–14 days if there's been no meaningful rain — just enough to keep the soil slightly moist, not wet.
A good rule of thumb: push your finger 5 cm into the soil near the garlic bed. If it feels dry at that depth, it's time to water. If it's cool and moist, leave it alone.
🔍 Winter Pest & Disease Watch
Winter isn't pest-free. Keep a relaxed but regular eye on your garlic bed — a quick check every week or two is all it takes.
Things to Watch For
Onion thrips: Can be active in milder northern regions even in winter. Look for silvery streaking on leaves. A neem oil spray can help manage low populations.
Slugs and snails: Love damp winter conditions. Protect young shoots with iron-based slug bait (safer around pets and wildlife than metaldehyde options).
White rot (Sclerotium cepivorum): A serious fungal disease that causes yellowing, wilting, and a white fluffy mould at the bulb base. If you see it, remove affected plants immediately and do not replant alliums in that bed for several years.
Rust (Puccinia allii): Orange-yellow pustules on leaves, more common in humid conditions. Good airflow around plants and avoiding overhead watering help prevent it. Light infections won't necessarily ruin your crop.
🌞 Transitioning from Winter to Spring
As August gives way to September and days lengthen noticeably, your garlic will shift gears. This is when bulb formation really begins, and your job changes slightly:
Increase feeding frequency slightly — once every 2–3 weeks with a balanced liquid fertiliser until mid-October.
Pull back mulch a little to allow the soil to warm more quickly in spring sunshine.
Watch for scapes (the curling flower stalks on hardneck varieties) from around October–November — snip these off to redirect the plant's energy into the bulb.
Stop feeding entirely once bulbing is well underway (roughly from late October). Late feeding can actually reduce bulb quality and storability.
Taper off watering in the final 3–4 weeks before harvest to help the outer wrappers dry and firm up.
🛒 Shop Garlic Growing Supplies at Botanical Love
Ready to give your winter garlic the very best start? At Botanical Love, we stock a carefully chosen range of New Zealand-grown garlic seed cloves, organic fertilisers with added sulphur, pea straw mulch, and all the hand tools you need to tend your veggie patch through the cold months. Browse our Vegetables category at botanicallove.co.nz and find everything you need to grow a crop worth bragging about at the Christmas table.
❓ Frequently Asked Questions
Should I fertilise garlic in the middle of winter when it's barely growing?
Yes, but lightly. A gentle liquid feed (seaweed or fish fertiliser at half-strength) in July keeps roots active and healthy without pushing frost-vulnerable soft growth. Avoid heavy nitrogen applications in the coldest weeks.
My garlic leaves are going yellow at the tips — is something wrong?
A little tip yellowing in deep winter can be normal, especially after a frost. If the yellowing is spreading down the whole leaf, check for waterlogging, white rot, or nutrient deficiency (particularly nitrogen or sulphur). Improve drainage first, then assess from there.
How thick should my mulch layer be over garlic in winter?
Aim for 5–8 cm of pea straw or similar loose organic mulch. In frost-prone inland areas, you can go up to 10 cm. Always leave a small gap of 2–3 cm around the base of each stem for airflow.
Can I grow garlic in containers through a NZ winter?
Absolutely. Use a deep pot (at least 30 cm), a quality free-draining potting mix, and feed regularly as nutrients leach faster in containers. Position pots where they'll get winter sun and good airflow, and be more attentive to watering as containers dry out and waterlog more easily than garden beds.
When should I stop watering garlic before harvest?
Reduce watering from about mid-November onwards (in most NZ regions) and stop almost entirely in the final 2–3 weeks before your expected harvest. This allows the outer skin layers to dry and cure properly, giving you better-storing bulbs.
— Botanical Love
Keep reading
More from the Blog
Gardening Tips
What to Sow in August NZ: Winter Indoor Seed-Starting Guide
Discover what to sow in August NZ with our winter indoor seed-starting guide. Get a head-start on spring with tomatoes, peppers, herbs & more. Tips for all regions.
🌽 How to Grow Popcorn Sweetcorn in NZ — Full Guide
If you've ever dreamed of growing your very own popcorn sweetcorn NZ-style — from tiny seed to bowlful of fluffy, home-popped goodness — then you are absolutely in the right place! 🌽✨ Growing popcorn at home is one of the most joyful, rewarding, and surprisingly easy projects you can take on in a Kiwi vegetable garden. Whether you're in sunny Northland or working with the shorter summers of Canterbury or Southland, this guide will walk you through everything you need to know to grow a cracking crop of popcorn corn from seed to harvest. Get ready — this is going to be so much fun! 🥰