Master the Art of Growing Climbing Tomatoes in a Greenhouse: Your Complete Guide to Abundant Harvests
11 July 2026 · 5 min read
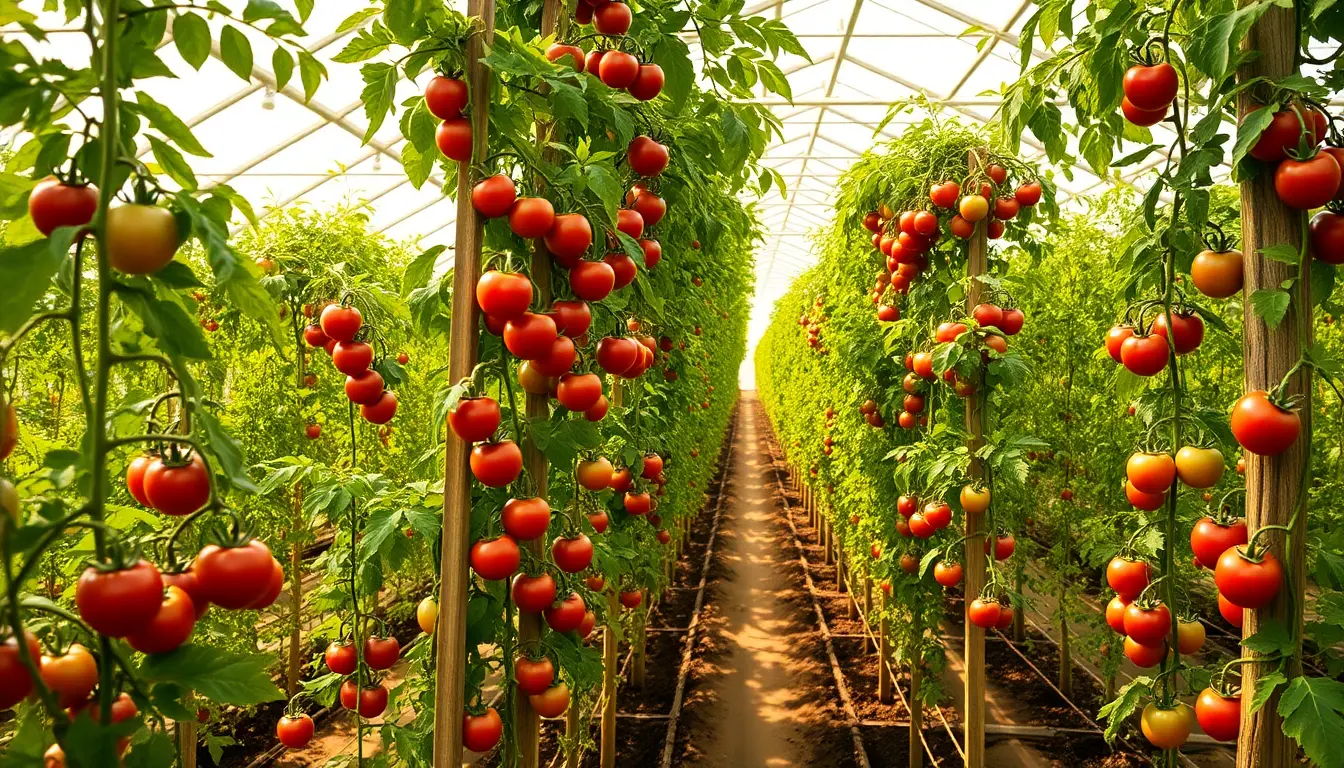
Growing tomatoes in a greenhouse is an absolute game-changer for any gardener, and when you focus on climbing varieties, you're setting yourself up for some seriously impressive yields. If you've ever dreamed of having a lush greenhouse bursting with vibrant red tomatoes cascading down trellises, you're in the right place. This comprehensive guide will walk you through everything you need to know about how to grow climbing tomatoes in a greenhouse, from selecting the perfect varieties to harvesting your bounty.
There's something genuinely magical about stepping into a warm greenhouse on a cool morning and being greeted by the sweet aroma of ripe tomatoes. The controlled environment of a greenhouse gives you the power to extend your growing season, protect your plants from unpredictable weather, and ultimately produce more tomatoes than you ever thought possible. Whether you're a complete beginner or someone with a bit of gardening experience, this greenhouse tomato growing guide will help you succeed.
Why Grow Climbing Tomatoes in a Greenhouse?
Let's start with the obvious question: why should you bother growing tomatoes in a greenhouse at all? Well, there are actually loads of fantastic reasons that make this approach worth your time and effort.
First off, greenhouses provide protection from the elements. Wind, heavy rain, and unexpected frosts can devastate outdoor tomato plants, but inside a greenhouse, your plants are safe and sound. This protection means you can grow year-round in many climates, extending your harvest season significantly.
Second, climbing tomatoes are incredibly productive. These indeterminate varieties just keep growing and producing fruit throughout the season. In a greenhouse where you can provide optimal conditions, you're looking at potentially hundreds of tomatoes from a single plant. That's not an exaggeration – it's genuinely possible with proper care.
Third, the controlled environment means you can manage temperature, humidity, and light more effectively. This leads to healthier plants, fewer diseases, and ultimately, better-tasting tomatoes. Plus, you'll spend less time fighting pests and diseases compared to outdoor growing.
Finally, there's the space efficiency factor. By training your climbing tomatoes vertically, you can maximize your greenhouse space. Instead of sprawling plants taking up valuable real estate, you've got neat, organized rows of plants reaching toward the roof. It's a brilliant way to get more production from a smaller footprint.
Choosing the Right Climbing Tomato Varieties
Not all tomatoes are created equal, and when it comes to greenhouse growing, you'll want to focus on indeterminate varieties – these are the climbers that just keep growing and producing fruit throughout the season.
Best Indeterminate Varieties for Greenhouses
Some absolute stars for greenhouse growing include Sungold, which produces sweet, bite-sized golden tomatoes that are incredibly prolific. If you want classic red slicing tomatoes, Brandywine is a fantastic choice, though it does require a bit more patience. For those who love cherry tomatoes, Gardeners' Delight is a reliable performer that produces masses of small, sweet fruits.
Other excellent choices include Moneymaker, a heritage variety that's been a greenhouse favorite for decades, and Shirley, which is disease-resistant and produces reliable yields. If you're after something a bit different, try Tumbling Tom or Indigo Rose – the latter produces stunning dark purple-black tomatoes that are absolutely delicious.
The key thing to remember is that indeterminate varieties are your friends in a greenhouse. These plants will keep growing taller and producing fruit as long as you keep them supported and fed. Determinate varieties, on the other hand, grow to a fixed size and produce most of their fruit at once – they're better suited to outdoor growing where you want a concentrated harvest.
Where to Source Quality Seeds
This is where Botanical Love comes in handy. Shopping for quality vegetable, herb, and flower seeds is crucial to your success, and you want to source from reputable suppliers who understand the New Zealand climate and growing conditions. Quality seeds mean stronger plants, better disease resistance, and ultimately, a more abundant harvest.
When selecting seeds, look for varieties that are specifically recommended for greenhouse growing. Read the seed packet descriptions carefully – they'll tell you whether a variety is indeterminate, how tall it grows, and what kind of yield you can expect. Don't just grab the cheapest option; invest in good quality seeds from trusted suppliers.
Preparing Your Greenhouse
Before you plant a single seed, you need to get your greenhouse ready. This preparation phase is absolutely crucial to your success.
Greenhouse Setup Essentials
Start by ensuring your greenhouse is clean. If you've been growing in it previously, give it a thorough wash with a mild disinfectant solution. This removes any lingering pests, diseases, or fungal spores that could cause problems later.
Next, check your ventilation system. Climbing tomatoes in a greenhouse need good air circulation to prevent fungal diseases. Make sure your greenhouse has vents that open automatically when temperatures rise, or plan to manually open them on warm days. A small fan can also help circulate air, especially on still days.
Install your support systems before planting. Whether you're using stakes, strings, or trellises, get them in place now. It's much easier to do this before plants are in the ground. For climbing tomatoes, many growers use a string system where plants are trained up vertical strings attached to the greenhouse roof. Others prefer sturdy stakes or a combination of stakes and string.
Make sure you have adequate lighting. While greenhouses let in natural light, supplemental grow lights can be beneficial, especially during winter months or in cloudier climates. Position lights about 30 centimeters above the plants and adjust as they grow.
Best Soil for Greenhouse Tomatoes
The soil you use is absolutely fundamental to your success. Greenhouse tomatoes are heavy feeders, so you need rich, well-draining soil that's packed with nutrients.
Create a soil mix that includes quality compost, peat moss or coco coir, and perlite or vermiculite for drainage. A good ratio is about 40% compost, 40% peat moss or coir, and 20% perlite. This creates a light, fluffy medium that drains well while retaining moisture and nutrients.
If you're growing in containers, use a premium potting mix rather than garden soil. Garden soil compacts too much in containers and doesn't drain well. For in-ground growing, work plenty of compost into your existing soil before planting.
Consider adding slow-release fertilizer to your soil mix before planting. This gives your plants a steady supply of nutrients throughout the growing season. You can also add mycorrhizal fungi, which help plants absorb nutrients more efficiently.
Temperature and Humidity Requirements
Tomatoes are warm-season crops, and they're quite particular about their growing conditions. Ideally, you want daytime temperatures between 20-25°C and nighttime temperatures around 15-18°C. Temperatures below 15°C slow growth significantly, while temperatures above 30°C can cause flower drop and reduce fruit set.
Humidity is another important factor. Aim for humidity levels between 60-70%. Too much humidity encourages fungal diseases like powdery mildew and early blight, while too little humidity stresses plants and can cause blossom end rot. Good ventilation helps manage humidity – open vents on warm days and ensure air is circulating throughout the greenhouse.
Monitor your greenhouse temperature and humidity with a thermometer and hygrometer. Many modern versions are digital and can record high and low readings, which helps you understand your greenhouse's microclimate.
Planting and Starting Your Tomatoes
Now comes the exciting part – getting your tomatoes in the ground!
When and How to Plant
Timing is crucial. In New Zealand, you'll typically want to start seeds indoors 6-8 weeks before your last frost date. For most of the country, this means starting seeds in late August or early September for a spring planting, or in late December or early January for a summer planting.
When starting seeds, use a quality seed-starting mix – this is lighter and fluffier than regular potting soil, which helps seeds germinate more easily. Fill seed trays with the mix, moisten it thoroughly, and plant seeds about 1 centimeter deep. Cover the tray with a humidity dome or plastic wrap to keep moisture in.
Keep the soil consistently moist but not waterlogged. Tomato seeds germinate best at temperatures around 20-25°C. You should see sprouts within 7-10 days. Once they emerge, remove the humidity dome and provide bright light – either from a sunny window or grow lights positioned about 10 centimeters above the seedlings.
Seed Starting Tips
Keep your seedlings warm and provide plenty of light. Leggy, weak seedlings result from insufficient light, so don't skimp on this. If you're using a sunny window, rotate the trays daily so seedlings grow straight rather than leaning toward the light.
Water seedlings from below by placing the tray in a container of water and letting it absorb moisture from the bottom. This prevents damping off disease, which kills seedlings at soil level.
Once seedlings develop their first true leaves (the second set of leaves that appear), you can start feeding them with a diluted liquid fertilizer every week or two. This gives them the nutrients they need to grow strong.
Transplanting Guidelines
When seedlings are about 10 centimeters tall and have developed several true leaves, it's time to pot them up into larger containers. Use 10-15 centimeter pots filled with potting mix. You can bury the seedling deeper than it was growing – tomatoes will develop roots all along the buried stem, creating a stronger root system.
Continue growing transplants in a warm, bright location. Keep them moist but not waterlogged. Harden them off before moving them to the greenhouse by gradually exposing them to outdoor conditions over 7-10 days. This toughens them up and prevents transplant shock.
When transplants are 20-30 centimeters tall and have developed several sets of true leaves, they're ready for the greenhouse. Space plants about 45-60 centimeters apart in rows, or follow the spacing recommendations for your specific variety. Plant them at the same depth they were growing in their pots, or slightly deeper to encourage a stronger root system.
Supporting and Training Your Plants
This is where the magic happens – how you support and train your climbing tomatoes will determine how productive they are and how easy they are to manage.
How to Support Tomato Plants in a Greenhouse
There are several excellent methods for supporting climbing tomatoes in a greenhouse. The string method is incredibly popular and works brilliantly. Install horizontal wires or ropes along the length of your greenhouse, attached securely to the structure. For each plant, tie a vertical string from the base of the plant to the overhead wire. As the plant grows, gently wind the main stem around the string, supporting it as it climbs.
The stake method involves driving sturdy stakes (bamboo, wood, or metal) into the ground next to each plant and tying the plant to the stake as it grows. This works well but requires more maintenance as you need to tie the plant regularly.
A trellis system uses a framework of wood or metal that plants climb. This is particularly useful if you're growing multiple plants close together.
Many growers combine methods – using stakes for the first meter or so, then switching to strings for the upper portion of the plant. This gives you the best of both worlds.
How to Train Climbing Tomatoes Step by Step in a Greenhouse
Training is an ongoing process throughout the growing season. Here's how to do it properly:
Start by selecting a single main stem to train upward. This is your leader. Gently guide this stem toward your support system and begin tying it loosely with soft ties or strips of cloth. Never tie too tightly – you want to allow for stem growth.
As the plant grows, continue tying the main stem to the support every 20-30 centimeters. Make sure ties are loose enough that you can slide a finger under them. Tight ties will cut into the stem as it thickens.
Remove side shoots (suckers) as they develop. These are shoots that grow in the angle between the main stem and leaf branches. Pinch them off when they're small – this directs all the plant's energy into the main stem and fruit production rather than vegetative growth.
Continue this process throughout the season, training the main stem upward and removing suckers. When the plant reaches the top of your support system or the greenhouse roof, you can either stop it there or allow it to grow horizontally along the roof.
How to Trellis Tomatoes in a Greenhouse
If you're using a trellis system, the principle is similar but you have more flexibility in how the plant grows. You can train the main stem vertically up the trellis, or you can allow it to grow more horizontally, weaving through the trellis structure.
The advantage of a trellis is that it provides more surface area for the plant to attach to, and it's easier to manage multiple stems if you want. Some growers prefer to allow 2-3 main stems per plant when using a trellis, which increases productivity.
Make sure your trellis is sturdy enough to support the weight of a fully laden plant. A mature tomato plant with fruit can weigh 20-30 kilograms or more, so don't skimp on structure.
Staking and String Systems
The string system is probably the most popular for commercial and serious home growers because it's efficient and allows for easy plant management. Here's how to set it up:
Install horizontal wires or strong rope along the length of your greenhouse, about 2 meters high or at the roof level. Space them about 60 centimeters apart if you have multiple rows.
For each plant, tie a vertical string from a point near the base of the plant to the overhead wire. Use a loop or knot that won't slip. As the plant grows, gently wind the stem around the string in a spiral pattern.
The beauty of this system is that you can easily lower plants as they grow. If your greenhouse is tall enough, you can lower the string and plant together as the plant grows, allowing it to continue growing taller. This is called "lowering" and it's a technique used by commercial growers to maximize production.
Watering and Feeding
Proper watering and feeding are absolutely essential for productive climbing tomatoes in a greenhouse.
How Often to Water Tomatoes in a Greenhouse
This is one of the most common questions, and the answer is: it depends. The frequency depends on temperature, humidity, soil type, and plant size. A small plant in cool weather might need water every 2-3 days, while a large plant in hot weather might need water daily or even twice daily.
The best approach is to check the soil regularly. Stick your finger about 5 centimeters into the soil. If it feels dry at that depth, it's time to water. If it's still moist, wait another day or two.
Water thoroughly until water drains from the bottom of the container or the soil is saturated. This ensures water reaches the entire root zone. Inconsistent watering – alternating between dry and wet – causes problems like blossom end rot and fruit cracking.
Water in the morning if possible. This gives foliage time to dry during the day, reducing fungal disease risk. Avoid wetting foliage; water at the base of plants instead.
In a greenhouse, you might consider installing a drip irrigation system. This delivers water directly to the root zone, is more efficient than hand watering, and reduces disease risk by keeping foliage dry. Drip systems can be set on timers, which is incredibly convenient.
Fertilizing Schedule
Tomatoes are heavy feeders and need regular fertilization throughout the growing season. Start feeding about 3-4 weeks after planting, once plants are established and growing actively.
Use a balanced fertilizer initially – something like a 10-10-10 NPK ratio. Once flowering begins, switch to a higher phosphorus and potassium fertilizer to encourage fruit production. A ratio like 5-10-10 works well.
Feed every 1-2 weeks with a liquid fertilizer, or use slow-release granules that provide nutrients over time. Follow the package instructions carefully – too much fertilizer can burn roots and reduce fruit quality.
Nutrient Requirements
Beyond the basic NPK (nitrogen, phosphorus, potassium), tomatoes need several other nutrients to thrive.
Calcium is crucial – a deficiency causes blossom end rot, where the bottom of the fruit develops dark, sunken spots. Provide calcium through crushed eggshells, bone meal, or calcium supplements added to the soil.
Magnesium supports photosynthesis and fruit production. If leaves develop yellow patches between the veins while veins remain green, your plant needs magnesium. Dissolve Epsom salt in water and spray or water plants with it.
Boron, zinc, and other micronutrients are also important. A good quality fertilizer will include these, but if you notice unusual symptoms, a micronutrient spray can help.
Pruning and Maintenance
Regular pruning and maintenance keep your plants healthy, productive, and manageable.
Pruning Climbing Tomatoes Techniques
The main pruning task is removing suckers – those shoots that grow between the main stem and leaf branches. Pinch these off when they're small, ideally when they're just a few centimeters long. This is much easier than removing large suckers later.
As plants grow taller, you can remove lower leaves once the plant is well-established.
— Botanical Love
Keep reading
More from the Blog
Zucchini Chutney & Relish: Make Your Own NZ Garden 🌱✨
🌱 From Garden Glut to Gorgeous Jars — Zucchini Chutney Relish NZ Style If you've ever grown zucchinis in a New Zealand summer, you know the joy — and the mild panic — of watching your plants produce way more than you bargained for! 🥰 That's exactly why learning to make your own zucchini chutney relish NZ style is such a game-changer. Instead of giving away bags of courgettes to every neighbour on the street, you can transform that beautiful bumper harvest into jars of golden, flavour-packed chutney and relish that you'll treasure all year long. ✨ Imagine opening your pantry in the middle of winter and pulling out a jar of summer sunshine you made with your own hands — how amazing is that?!
🌿 Grow & Process Your Own Sugar Cane into Sugar in NZ!
If you've ever dreamed of producing your very own sweetener straight from the garden, learning to grow sugar cane NZ-style is one of the most exciting and rewarding projects you can take on! 🌱 Sugar cane (Saccharum officinarum) is a magnificent, towering tropical grass that thrives surprisingly well in the warmer corners of Aotearoa — and the best part is, it's far more achievable than most Kiwi gardeners realise. Imagine walking out to your backyard, harvesting a bundle of golden canes, and squeezing fresh juice to make your very own raw sugar or golden syrup. How amazing is that?! This guide walks you through absolutely everything — from choosing the right variety and finding the perfect spot, all the way through to processing your harvest into real, homemade sweetness. ✨