How to Grow Spring Onions from Seed: A Complete 2026 Guide
14 April 2026 · 5 min read
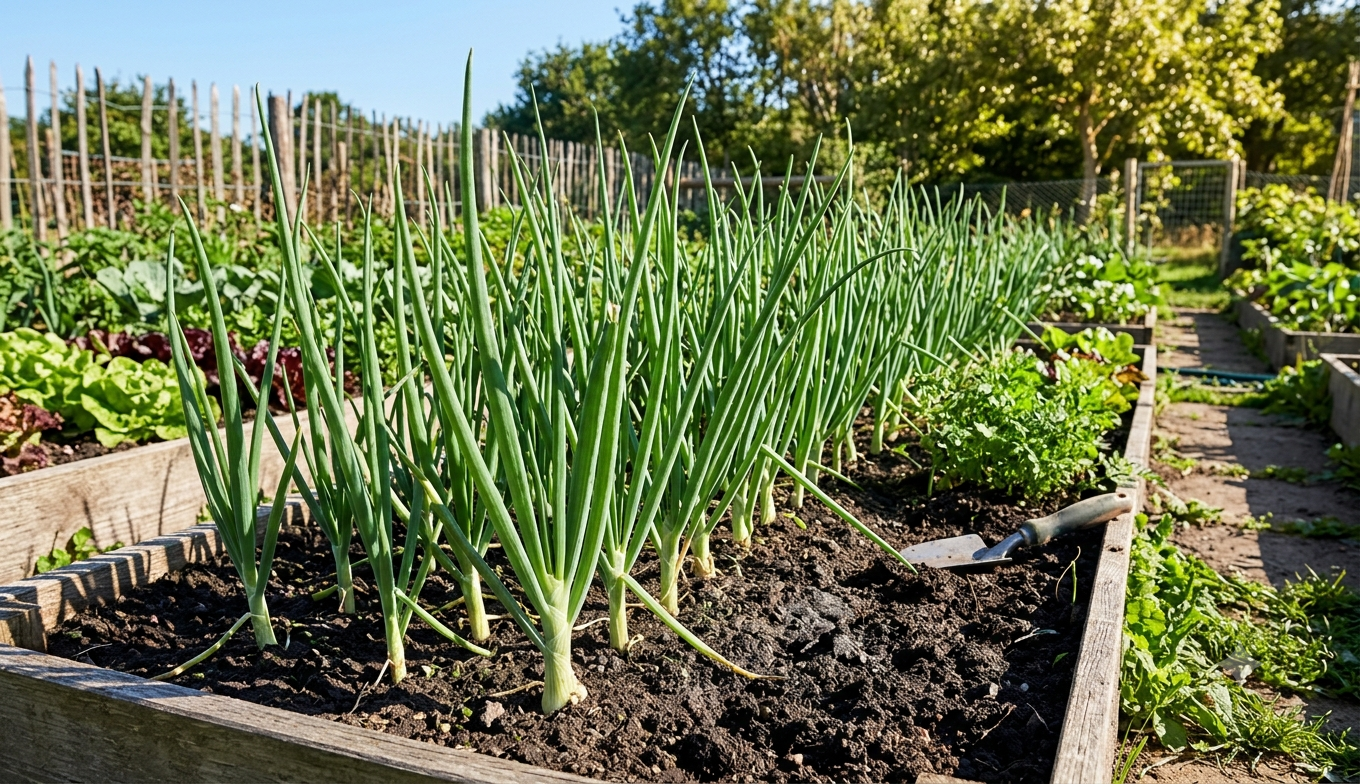
Wondering how to grow spring onions from seed to enjoy fresh, crunchy greens in your kitchen? Growing spring onions is straightforward and rewarding, offering a continuous supply of tasty bulbs and stems perfect for salads and stir-fries. This guide walks you through every step—from choosing the right variety to harvesting and storing your crop—helping you achieve a successful onion-growing season in your own garden.
Understanding Spring Onions and Their Benefits: Spring onions, also called green onions or scallions, are immature onion plants harvested before the bulb fully develops. Unlike mature onions, they have a smaller bulb and tender green stalks, providing a milder flavor. They are a great ingredient for salads, stir-fries, and garnishes, packed with vitamins and antioxidants. Growing from seed allows gardeners to access a wide range of heirloom and disease-resistant varieties, ensuring better crop quality and yield.
Choosing the Right Spring Onion Variety for Your Garden: Selecting the right spring onion cultivar is key to a successful harvest. Popular varieties like 'White Lisbon' and 'Tokyo Long White' are well-suited for seed sowing and produce crisp, flavorful onions. Consider your local climate and day length, as short-day or long-day onions may perform differently depending on your region. Choosing a variety adapted to your conditions boosts growth rates and bulb quality.
When to Sow Spring Onion Seeds for Best Results: The best time to sow spring onion seeds is early spring, typically after the last frost, though some gardeners also sow in fall for a second crop. Spring onions are relatively quick to mature, usually ready about eight weeks after sowing. While you can sow seeds directly into the ground, starting seeds indoors can give a head start in cooler climates, extending your onion growing season.
Preparing Soil for Spring Onion Seed Sowing: Spring onions thrive in fertile, well-draining soil with a pH between 6.0 and 7.0. Before planting, clear weeds and loosen the soil to a fine tilth. Incorporate well-composted organic matter or balanced fertilizer to boost nutrients. Ensure the soil is moist but not waterlogged to provide an ideal environment for germinating spring onion seeds.
How to Sow Spring Onion Seeds Step-by-Step: Decide whether to sow seeds directly outdoors or start indoors in seed trays or seedbeds. Sow seeds about ½ inch deep, spacing them roughly 1 inch apart to allow room for growth. Cover seeds lightly with soil and water gently but thoroughly to settle them. After sowing, apply a thin layer of mulch to retain moisture and protect young spring onion seedlings from fluctuating temperatures and weeds.
Starting Spring Onions Indoors: Best Practices: Starting onion seeds indoors 8 to 10 weeks before the last frost helps young plants get a strong start. Use seed trays with good drainage and grow them in a warm spot with plenty of light, ideally 60-75°F. Thin seedlings to about 5 cm apart once they have two sets of true leaves. Transplant outdoors when seedlings are sturdy and local soil temperatures have warmed.
Planting Out and Transplanting Spring Onion Seedlings: Prepare your outdoor bed by loosening soil and removing weeds. Space spring onion seedlings 2.5 to 5 cm apart in rows or clumps, gently firming soil around roots to avoid air pockets. Water thoroughly after transplanting to reduce shock and encourage root establishment. Keep young plants moist and monitor them closely during the first few days outdoors.
Watering and Moisture Needs for Young Spring Onions: Consistent moisture is essential while young spring onions establish roots, but avoid waterlogging, which can cause disease. Water lightly every few days, adjusting frequency based on weather—more often in heat, less during rain. Mulching helps conserve soil moisture and reduces watering needs. Watch for signs like yellowing leaves that indicate too much or too little water.
Thinning and Tending Spring Onion Seedlings: Thinning prevents overcrowding, giving remaining plants space to develop large bulbs and thick stems. Thin seedlings to approximately 5 cm apart by snipping weaker plants at soil level to avoid disturbing roots. Regular weeding and inspection for pests such as thrips help maintain healthy spring onion plants throughout the growing season.
Managing Pests and Diseases in Spring Onion Cultivation: Common pests include onion thrips and onion flies, which damage leaves and stunt growth. Use companion planting (e.g., carrots or herbs) and organic deterrents like neem oil to protect your crop. Diseases such as neck rot or downy mildew show leaf yellowing and decay; remove affected plants promptly and maintain good airflow. Regular monitoring and garden hygiene reduce risks substantially.
How and When to Harvest Spring Onions: Spring onions are usually ready to harvest around eight weeks after sowing. Look for strong green leaves and bulbs about 1-2 cm in diameter. You can pull up entire plants or snip green leaves as needed, allowing continuous harvesting. Cutting spring onions above soil level encourages new growth for a second harvest, maximizing your yield.
Storing and Using Your Harvested Spring Onions: Store fresh spring onions wrapped loosely in a damp paper towel inside the refrigerator to maintain crispness for up to a week. For longer storage, blanch and freeze them, preserving flavor for months. Use freshly harvested spring onions in salads, salsas, stir-fries, or as garnishes to enjoy their vibrant, fresh taste at its best.
Tips to Maximize Your Spring Onion Crop and Continuous Harvest: Sow spring onion seeds every two to three weeks to stagger harvests and ensure an ongoing supply. Instead of pulling plants, cut green stems at soil level to encourage regrowth. Utilize narrow garden beds or micro gardens to grow in small spaces efficiently. Maintain soil fertility throughout the season with periodic additions of compost or balanced fertilizer for robust growth.
Frequently Asked Questions About Growing Spring Onions: Can you sow spring onion seeds directly into the ground? Yes, spring onion seeds can be sown directly outdoors as soon as the soil can be worked, making it simple for home gardeners to get started. How long does it take for spring onions to grow from seed? Typically, spring onions are ready to harvest about eight weeks after sowing, but timing can vary with conditions. To avoid overcrowding, thin seedlings once sprouted, and maintain consistent watering to support healthy growth and prevent stress.
For more detailed seed options and to explore heirloom, untreated varieties suitable for your garden, check out Spring Onion - Zeffa Seeds - Botanical Love for high yielding, disease-resistant spring onion seeds perfect for home gardeners.
— Botanical Love
Keep reading
More from the Blog
Zucchini Chutney & Relish: Make Your Own NZ Garden 🌱✨
🌱 From Garden Glut to Gorgeous Jars — Zucchini Chutney Relish NZ Style If you've ever grown zucchinis in a New Zealand summer, you know the joy — and the mild panic — of watching your plants produce way more than you bargained for! 🥰 That's exactly why learning to make your own zucchini chutney relish NZ style is such a game-changer. Instead of giving away bags of courgettes to every neighbour on the street, you can transform that beautiful bumper harvest into jars of golden, flavour-packed chutney and relish that you'll treasure all year long. ✨ Imagine opening your pantry in the middle of winter and pulling out a jar of summer sunshine you made with your own hands — how amazing is that?!
🌿 Grow & Process Your Own Sugar Cane into Sugar in NZ!
If you've ever dreamed of producing your very own sweetener straight from the garden, learning to grow sugar cane NZ-style is one of the most exciting and rewarding projects you can take on! 🌱 Sugar cane (Saccharum officinarum) is a magnificent, towering tropical grass that thrives surprisingly well in the warmer corners of Aotearoa — and the best part is, it's far more achievable than most Kiwi gardeners realise. Imagine walking out to your backyard, harvesting a bundle of golden canes, and squeezing fresh juice to make your very own raw sugar or golden syrup. How amazing is that?! This guide walks you through absolutely everything — from choosing the right variety and finding the perfect spot, all the way through to processing your harvest into real, homemade sweetness. ✨