🌿 Grow & Regrow Kūmara in NZ: The Complete Guide ✨
11 July 2026 · 5 min read
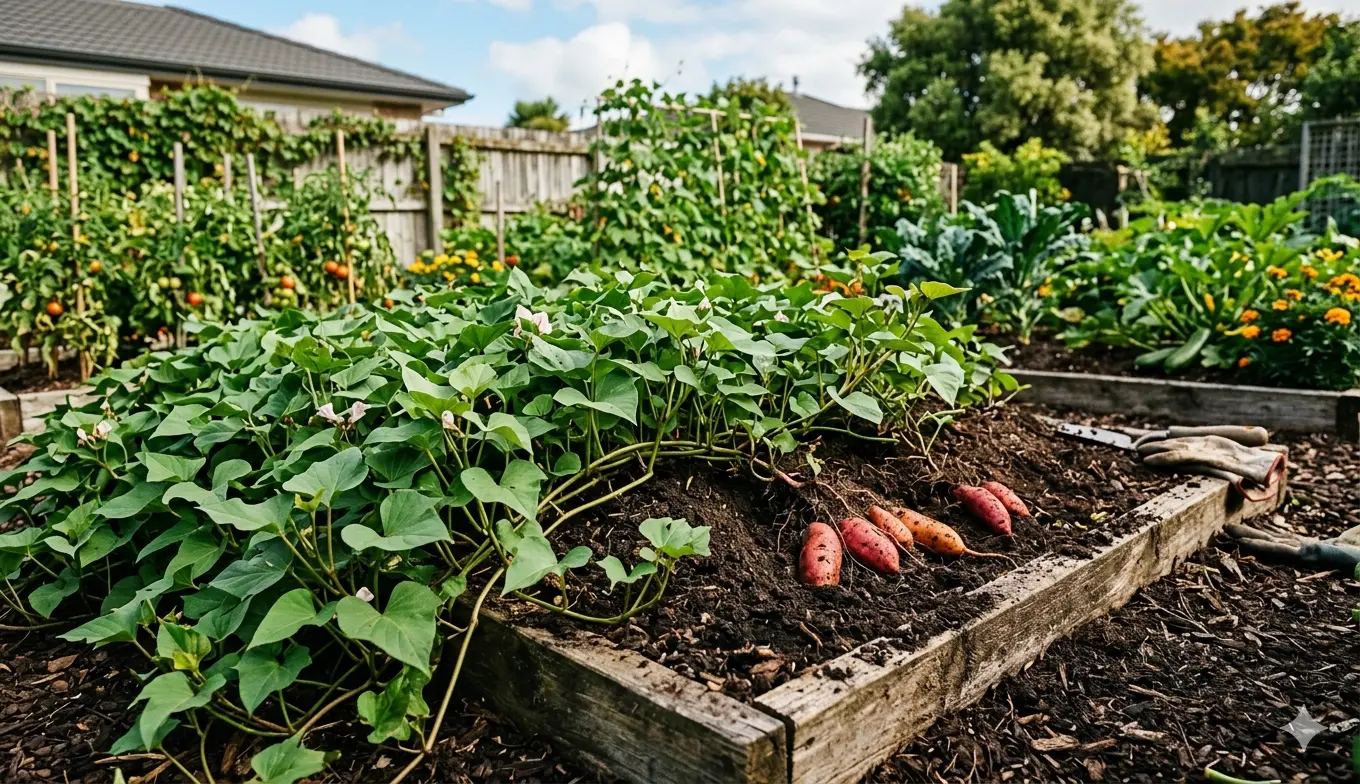
Ready to grow kūmara NZ-style and fill your pantry with one of Aotearoa's most beloved root vegetables? 🌿 Whether you're a first-time gardener who's never grown a thing, or a seasoned vegie-bed veteran looking to expand your repertoire, kūmara (sweet potato) is one of the most rewarding, joyful crops you can plant in a New Zealand garden. The vines are lush, the harvest is spectacular, and — best of all — you can even regrow kūmara from scraps you'd otherwise toss in the compost. How amazing is that? 🥰 Let's dig in!
🌱 Why Every NZ Gardener Should Grow Kūmara
Kūmara has deep roots in Aotearoa — it arrived with Māori voyagers centuries ago and has been a cornerstone of the New Zealand food garden ever since. Beyond its rich cultural heritage, it's simply a fantastic plant to grow. The sprawling vines act as a living mulch, suppressing weeds and keeping the soil moist. The leaves are edible! The tubers store brilliantly. And there's something truly magical about pulling a cluster of plump, jewel-coloured roots from the warm earth in autumn. ✨ You'll love every single moment of it.
Kūmara thrives in our warm northern and coastal regions, but with a little care, even Southland gardeners can pull off a successful crop. If you've ever wondered about spring vegetable gardening NZ-style, kūmara is honestly one of the stars of the show — it loves exactly the long, warm days our summers deliver. 🌻
☀️ When to Plant Kūmara NZ — Getting the Timing Right
Timing is everything with kūmara! 🗓️ This is a warm-season crop, so the golden rule is: don't rush it. Kūmara hates cold soil and frost — full stop.
Northland, Auckland, Waikato, Bay of Plenty: Plant out from late October to mid-November. Your warm, humid summers are basically kūmara paradise. 🌈 Gisborne, Hawke's Bay, Nelson, Marlborough: Aim for early to mid-November once soil temps are consistently above 16°C. Wellington, Canterbury, and cooler regions: Wait until mid-to-late November and consider using black plastic mulch to warm the soil beforehand. Otago and Southland: Choose a sheltered, north-facing spot, start slips indoors, and plant out in late November to early December at the earliest. You've got this! 💚
The key is to know when to plant kūmara NZ for your specific region — soil temperature matters far more than the calendar date. Grab a cheap soil thermometer if you're unsure; you're aiming for at least 16–18°C at a 10 cm depth before planting out.
🪴 Kūmara Soil Preparation — Building the Perfect Bed
Great kūmara starts with great soil! 🥰 Proper kūmara soil preparation is genuinely one of the most important things you can do for a bumper crop. Kūmara loves:
Free-draining, sandy loam — heavy clay will cause the tubers to rot. Raise your beds or work in plenty of grit and compost if you're on clay soil. Slightly acidic pH — aim for 5.5–6.5. A quick pH test kit will tell you where you stand. Low nitrogen — too much nitrogen (from fresh manure or excess fertiliser) drives lush leaf growth at the expense of tubers. Use a balanced compost instead. Warm, mounded rows — traditional kūmara mounds (raised ridges about 30 cm high) improve drainage and warm up faster in spring. Our Māori growers had this figured out perfectly. ✨
Dig your bed to at least 30–40 cm deep to give those tubers room to develop without obstruction. Work in a couple of handfuls of blood and bone for a gentle nutrient boost, and your kūmara will be absolutely thriving. 🌿
🌿 How to Grow Kūmara from Slips — Step by Step
The most common (and exciting!) way to grow kūmara is from kūmara slips NZ gardeners swear by — these are the sprouting shoots that grow from a parent tuber. Here's how to get started:
Source your parent tubers — choose firm, healthy kūmara. You can use tubers from a reputable garden supplier (you'll find options at Botanical Love 🌱) or a certified sprouting kūmara if available in your region. Avoid supermarket kūmara as they are often treated to prevent sprouting. Sprout your slips (8–10 weeks before planting) — place the tuber half-submerged in a jar of water or nestled in a tray of moist sand in a warm, bright spot (at least 20–22°C). A sunny windowsill or heat mat works brilliantly. Twist off the slips — once slips are 15–20 cm long and have a few leaves, twist them off the tuber carefully. Each slip will become a new plant! Root the slips — pop the slips in a glass of water for 5–7 days until you see white roots developing. Once rooted, they're ready to plant. Plant out — space plants 30–40 cm apart in your prepared mounds, burying the slip up to its neck. Water in gently and give them a warm, happy welcome to their new home! 🥰 🌱 Regrow Kūmara from Scraps — Zero-Waste Magic!
Here's one of the most joyful discoveries in the NZ kitchen garden — you can absolutely regrow kūmara from scraps! If you have a piece of kūmara left over from cooking (one with at least one visible eye or bud), you can bring it back to life. ✨ Simply:
Place the kūmara scrap cut-side down in a shallow dish of water. Keep it in a warm, bright spot and change the water every couple of days. Slips will begin shooting within 1–3 weeks — once rooted, treat them exactly as described above.
This is a brilliant activity to do with kids, and it's a beautiful reminder of just how generous plants can be. 💚 The kūmara growing guide New Zealand tradition of regrowing from saved tubers is as old as the crop itself — you're connecting with something really special here.
🌼 Best Kūmara Varieties NZ Gardeners Love
Choosing the best kūmara varieties NZ has to offer will make a real difference to your harvest. Here are the favourites to look out for:
Beauregard — the most widely grown variety in NZ. Orange flesh, reliable cropper, suits most regions. A great beginner choice! Purple Dawn / Purple — stunning deep-purple skin and flesh, packed with antioxidants. Slightly drier texture. Gorgeous on the plate. 🌈 Red (Owairaka Red) — a classic NZ heritage variety with red skin and creamy-yellow flesh. Beloved by Kiwi gardeners for generations. Gold — golden skin, sweet orange flesh, wonderful flavour. Excellent for warmer northern regions.
If you're searching to buy kūmara seeds NZ-wide, look for certified slips or tubers from trusted NZ suppliers to ensure you're getting disease-free, true-to-type stock.
💧 Kūmara Care and Watering Tips Through the Season
Once your plants are in the ground, the good news is that kūmara is wonderfully low-maintenance! 🌻 Follow these simple kūmara care and watering tips and you'll be rewarded handsomely:
Water deeply but infrequently — once established (about 2–3 weeks after planting), kūmara is drought-tolerant. Deep watering every 7–10 days is better than shallow daily watering. Stop watering 2–3 weeks before harvest — this improves flavour and skin quality. Trust the process! ✨ Keep the vines in check — if vines root into the soil at nodes, it can reduce the main crop. Gently lift and re-direct wandering vines every few weeks. Mulch around plants — a layer of pea straw or sugarcane mulch retains moisture and keeps roots cool during summer heat. 💚 🐝 Sweet Potato Companion Planting NZ Style
Want to garden smarter? Sweet potato companion planting NZ gardeners use can give your kūmara a real boost. Great companions include:
Nasturtiums — attract beneficial insects and deter aphids naturally. Beautiful too! 🌼 Marigolds — excellent for deterring nematodes in the soil. Sweetcorn — the tall stalks provide gentle shade for kūmara vines in the hottest part of summer. Thyme and oregano — aromatic herbs that help confuse pests. Plant them along the borders of your bed.
Avoid planting kūmara near squash or pumpkin, as these vigorous vines will compete aggressively for space and resources. Keep those two apart and everyone will be happier! 😄
🍂 Harvesting Kūmara NZ — Knowing When and How
Harvesting kūmara NZ is genuinely one of the most exciting moments in the gardening year — it's like finding buried treasure! 🏆 Here's how to nail it:
Timing: Kūmara is typically ready to harvest 16–20 weeks after planting, usually in April–May (late summer to early autumn in most NZ regions). The leaves will start to yellow and die back — that's your signal! 🍂 How to harvest: Use a garden fork rather than a spade — insert it about 30 cm away from the base of the plant and lever gently upward to avoid slicing the tubers. Slide your hands into the loosened soil to feel for tubers. Handle with care: Freshly dug kūmara have delicate skin. Avoid dropping or bruising them as you harvest. Curing: Lay tubers in a warm (28–30°C), humid spot for 4–7 days after harvest. This toughens the skin, heals cuts, and dramatically improves storage life and sweetness. A warm garage or glasshouse is perfect.
Once cured, kūmara can be stored in a cool, dry, dark spot for several months. Imagine opening that storage box in the depths of winter and pulling out gorgeous home-grown kūmara! 🥰
🌿 Kūmara Pests and Diseases NZ Gardeners Should Know
The great news is that kūmara is relatively pest-resistant, but there are a few kūmara pests and diseases NZ gardeners should keep an eye out for:
Kumara moth (Brachmia macroscopa) — larvae tunnel into tubers. Rotate crops annually and avoid leaving old tubers in the ground over winter. Aphids — can cluster under leaves. A strong blast of water or a neem oil spray will sort them quickly. Wireworm — tunnels through tubers. Good soil preparation and crop rotation are your best defences. Root rot / fungal diseases — almost always caused by waterlogged soil. Free-draining soil and raised mounds prevent this beautifully. 🪴 Growing Kūmara in Containers — Yes, You Can!
Don't have a big garden? No problem at all! Growing kūmara in containers is 100% achievable and so much fun. 🎉 You'll need:
A large container — at least 40–50 cm deep and 60 cm wide. A half wine barrel or a large fabric grow bag works wonderfully. A free-draining premium potting mix blended with coarse sand and a little compost. A warm, sunny spot — at least 6–8 hours of direct sun per day. Regular watering — containers dry out faster than garden beds, so check moisture levels every couple of days in summer.
You may get a slightly smaller yield than in-ground, but the joy of tipping out your container in autumn to reveal a cascade of home-grown kūmara is absolutely priceless! ✨ This is also a brilliant way to grow sweet potatoes Auckland apartment balconies, small decks, or courtyard gardens.
💚 How to Save Kūmara for Replanting Next Season
One of the best parts of growing your own kūmara is that you never need to buy new slips if you save a few tubers each year! Store 3–5 of your finest, healthiest tubers in a cool (around 13°C), dark, well-ventilated spot over winter. In late winter (July–August), bring them out and start sprouting them again as described above. Year after year, season after season — your kūmara journey just keeps growing. 🌿 This is truly the essence of how to grow sweet potatoes NZ-style: simple, sustainable, and deeply satisfying.
🛒 Shop the Range at Botanical Love
Ready to start your kūmara adventure? At Botanical Love (botanicallove.co.nz), we stock a wonderful range of vegetable seeds, garden supplies, and growing accessories to help you grow the most amazing edible garden. 🌱 Browse our Vegetable Seeds and Root Vegetables categories for seasonal planting options, and check out our Garden Supplies section for soil amendments, mulches, and everything you need to get those kūmara mounds singing. We'd love to be part of your growing journey! 💚
❓ Frequently Asked Questions When is the best time to plant kūmara in New Zealand?
The best time to plant kūmara in NZ is from late October through to mid-December, depending on your region. Warmer northern areas (Northland, Auckland) can plant earlier, while cooler southern regions should wait until soil temperatures are consistently above 16°C. Never plant into cold or frosty soil.
Can I grow kūmara from a supermarket kūmara?
It's generally not recommended. Most supermarket kūmara are treated with a sprout inhibitor to extend shelf life. For best results, source certified sprouting tubers or slips from a reputable garden supplier to ensure healthy, untreated stock that will actually sprout reliably. 🌱
How long does kūmara take to grow in NZ?
Kūmara typically takes 16–20 weeks from planting to harvest in New Zealand conditions. That means if you plant in November, you can expect a gorgeous harvest in April or May. Cooler regions may need the full 20 weeks, while warm northern gardens might see earlier results. 🍂
Why are my kūmara leaves growing well but the tubers are small?
This usually means your soil has too much nitrogen, causing the plant to put its energy into leaf growth rather than tuber development. Avoid fresh manure or high-nitrogen fertilisers around kūmara. Also ensure the vines aren't re-rooting at the nodes — lift and redirect them regularly. 💚
Can I regrow kūmara from kitchen scraps?
Absolutely, yes! Place a piece of kūmara with at least one eye or bud in a shallow dish of water in a warm, sunny spot. Slips will sprout within 1–3 weeks. Once the slips have roots, plant them out as you would any other slip. It's a wonderfully sustainable way to grow! ✨
Is kūmara the same as sweet potato?
Yes! Kūmara is the Māori name for sweet potato (Ipomoea batatas), and the terms are used interchangeably in New Zealand. The varieties grown here have been part of NZ food culture for centuries, with some distinct heritage varieties like Owairaka Red being uniquely Kiwi. 🌿
— Botanical Love
Keep reading
More from the Blog
Zucchini Chutney & Relish: Make Your Own NZ Garden 🌱✨
🌱 From Garden Glut to Gorgeous Jars — Zucchini Chutney Relish NZ Style If you've ever grown zucchinis in a New Zealand summer, you know the joy — and the mild panic — of watching your plants produce way more than you bargained for! 🥰 That's exactly why learning to make your own zucchini chutney relish NZ style is such a game-changer. Instead of giving away bags of courgettes to every neighbour on the street, you can transform that beautiful bumper harvest into jars of golden, flavour-packed chutney and relish that you'll treasure all year long. ✨ Imagine opening your pantry in the middle of winter and pulling out a jar of summer sunshine you made with your own hands — how amazing is that?!
🌿 Grow & Process Your Own Sugar Cane into Sugar in NZ!
If you've ever dreamed of producing your very own sweetener straight from the garden, learning to grow sugar cane NZ-style is one of the most exciting and rewarding projects you can take on! 🌱 Sugar cane (Saccharum officinarum) is a magnificent, towering tropical grass that thrives surprisingly well in the warmer corners of Aotearoa — and the best part is, it's far more achievable than most Kiwi gardeners realise. Imagine walking out to your backyard, harvesting a bundle of golden canes, and squeezing fresh juice to make your very own raw sugar or golden syrup. How amazing is that?! This guide walks you through absolutely everything — from choosing the right variety and finding the perfect spot, all the way through to processing your harvest into real, homemade sweetness. ✨